When it comes to laboratory work, understanding Centrifuge Diagrams is pretty important if you want to keep things running smoothly and get more accurate test results. I came across a report from MarketsandMarkets that predicts the global market for medical centrifuges is really set to grow in the near future. This just shows how much folks are craving more advanced automation tools in labs, especially from high-tech companies like Zhejiang Pushkang Biotechnology Co., Ltd. They started back in 2014, and since then, PUSHKANG has been using its core tech in centrifugal microfluidics to create all kinds of point-of-care testing devices for things like blood coagulation, biochemistry, and molecular diagnostics. Getting the hang of these Centrifuge Diagrams isn't just about mastering the machines — it also helps you manage workflows better and use resources more effectively, which can really lead to better results in today’s diagnostic labs.

Understanding the Basics of Centrifuge Diagrams for Lab Efficiency
Centrifuge diagrams are pretty much essential for making lab work smoother and more efficient. If you get a good grip on how these diagrams work, it can really change the game when it comes to preparing and separating samples. Basically, a typical centrifuge spins samples at super high speeds, which creates a centrifugal force that sorts substances based on how dense they are. The American Chemical Society reports that understanding these diagrams properly can help you get better separation results and cut down processing times by as much as 30%.

To really make the most out of your lab work, it’s important to understand key things like rotor speed, the relative centrifugal force (or RCF), and how the centrifuge’s rotor is shaped. Ignoring or misunderstanding these details can lead to poor sample separation, which might mess up your results or slow things down. For example, a study in the Journal of Laboratory Automation points out that if you don’t fully understand RCF, your samples might not be properly separated, resulting in delays and extra costs. By actually applying what you learn from centrifuge diagrams in day-to-day experiments, scientists can get better results and speed up their workflows—helping push their research forward.
Identifying Key Components in Centrifuge Diagrams
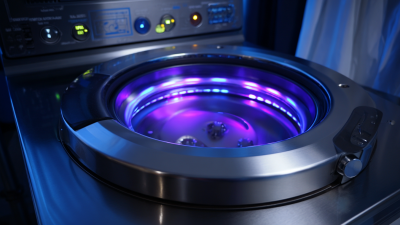
Getting the hang of centrifuge diagrams is pretty important if you want your lab work to run smoothly. These diagrams usually show the main parts of a centrifuge, and each one has its own role in how the machine works. For example, you’ve got the rotor—that’s the part that spins your samples super fast—and then there’s the base or chamber, which holds everything together and keeps the right environment going. Once you get comfortable with these parts, you can set up and use the centrifuge properly, which means better sample processing overall.
Another thing you’ll notice in centrifuge diagrams is the type of rotor used. Different rotors are meant for different jobs. For instance, fixed-angle rotors are great if you need to pellet down your samples, whereas swinging-bucket rotors are kind of the go-to if you want better separation because they swing out during spinning. Plus, understanding the maximum RCF (that’s the centrifugal force) and the speed settings shown in the diagrams is really key to getting the results you’re after. When you know how to read these diagrams correctly, you can make smarter choices, leading to more reliable experiments and better data.
How to Read Centrifuge Diagrams for Maximum Efficiency in Laboratory Processes - Identifying Key Components in Centrifuge Diagrams
| Component |
Description |
Importance |
Common Issues |
| Rotor |
The rotating part that holds the samples during centrifugation. |
Critical for separation efficiency and speed. |
Imbalance can lead to noise and damage. |
| Bucket |
Holds sample containers and attaches to the rotor. |
Ensures safe and secure containment of samples. |
Improper loading can cause uneven separation. |
| Control Panel |
Interface for setting speed, time, and temperature. |
User control over processes for optimal results. |
Malfunctions can result in incorrect settings. |
| Lid Lock |
Secures the centrifuge lid during operation. |
Prevents accidents and sample contamination. |
Failure can lead to safety hazards. |
| Cooling System |
Maintains temperature control during centrifugation. |
Important for temperature-sensitive samples. |
Overheating can degrade samples. |
Interpreting Speed and RCF Values for Optimal Performance
Getting the hang of centrifuge diagrams is pretty important if you wanna get the best results in the lab. Knowing how speed and relative centrifugal force (RCF) work together helps scientists tweak their centrifugation methods to fit each experiment perfectly. I mean, depending on what kind of samples you’re dealing with and what you’re trying to achieve, you’ve gotta choose your settings carefully. For instance, cranking up the RCF can really speed up the sedimentation process, which is super useful when you're separating cell parts or purifying proteins.

Plus, understanding how the centrifuge's speed affects RCF can seriously boost your workflow efficiency. Researchers usually check out charts that link speed to RCF, taking into account the rotor type and size. This not only makes their results more precise but also helps avoid messing up sensitive samples. Once you get the hang of reading these diagrams, you can make sure your centrifugation is both effective and consistent. And trust me, that’s key for getting trustworthy scientific results every time.
Analyzing the Impact of Sample Volume and Density on Results
Getting a good handle on how sample volume and density influence centrifuge results is pretty key if you're serious about nailing laboratory procedures. Basically, the amount of sample you put in has a big impact on how fast and effectively things settle down.
If you cram in a bigger volume, it might take longer to centrifuge — and there’s a risk of overheating or not getting a proper separation.
So, it’s all about finding that sweet spot between your sample size, what your centrifuge and rotor can handle, otherwise you might end up messing up your results or causing unwanted variability.
Now, density is another big player when it comes to separating stuff in a mix. When components have quite different densities, they tend to separate more cleanly under centrifugal force.
That means, depending on how dense your samples are, you might need to tweak the rotor speed or change the setup a bit. By paying attention to these factors, scientists can actually improve how well things separate, reduce contamination, and get better yields — which all adds up to more reliable results across different lab works.
Common Mistakes to Avoid When Reading Centrifuge Diagrams
When you're looking at centrifuge diagrams, it's super important to avoid some common mistakes that could mess with your lab work. One big slip-up people make is misreading the speed and the relative centrifugal force (RCF) shown on the diagram. A lot of folks forget that RCF isn’t always directly tied to the speed setting alone — different rotor types can really change how everything turns out. Missing these details can lead you to think your samples are separating better or worse than they actually are, which is definitely not ideal.
Another mistake that trips people up is not paying enough attention to the recommended settings and conditions that come with each protocol. Diagrams usually include key info like temperature and spin time—ignoring these can totally throw off your results. Plus, misunderstanding what the labels and scales mean on the diagram can lead to putting samples in the wrong spots or running the centrifuge at the wrong settings. So, it’s really worth taking the time to understand everything fully before you hit start. Trust me, a little prep goes a long way in avoiding headaches later on.
Enhancing Laboratory Workflow Through Effective Diagram Utilization
Using centrifuge diagrams effectively can really make a difference in the lab’s workflow. They’re great visual tools that help you quickly understand how different centrifuges work—stuff like their speed, capacity, and how they handle samples. When team members can glance at these diagrams and get the gist fast, it’s easier to pick the right settings for whatever task they’re working on. This not only saves time but also helps cut down on mistakes.
Plus, these diagrams are super handy for training new folks. Instead of giving long explanations every time, new team members can refer to the diagrams to get the basics down. It kind of encourages a more independent attitude—people feel more confident handling the equipment on their own. When everyone on the team knows how to read these diagrams, it keeps everything running smoothly and makes sure results stay consistent across different experiments. All in all, integrating diagram literacy into everyday lab routines just makes things more organized and efficient.
Understanding Centrifuge Utilization in Laboratory Processes
This bar chart represents the efficiency percentages of different centrifuge models used in laboratory processes. By analyzing their performance, laboratories can choose the most effective centrifuge to enhance workflow and ensure optimal results.
FAQS
: The key components include the rotor, which spins samples at high speeds, and the base or chamber, which houses the rotor and maintains the required environment.
Fixed-angle rotors are ideal for pelleting applications, while swinging-bucket rotors allow for enhanced separation due to their ability to swing out during operation.
Understanding RCF and speed settings is crucial for achieving the desired separation results and optimizing sample processing.
Larger sample volumes can prolong centrifugation time and risk inconsistencies due to overheating or insufficient separation, making it important to balance sample size with centrifuge capacity.
Samples with significantly different densities separate more effectively under centrifugal force, enhancing the delineation of phases in a mixture.
Adjustments to the rotor's speed and configuration may be necessary to optimize separation efficiency depending on the density of the samples.
Exceeding the centrifuge's capacity with overly large sample volumes may compromise performance and lead to unwanted experimental variances.
Familiarizing with centrifuge diagrams helps lab personnel ensure proper setup and usage, ultimately optimizing sample processing and improving experimental outcomes.
By understanding key components and factors affecting centrifugation, scientists can increase separation efficiency, minimize contamination, and enhance yield for more reliable results.
Failure to consider sample density can lead to ineffective separation and overall less reliable experimental outcomes in various laboratory applications.
Conclusion
Getting the hang of centrifuge diagrams is pretty important if you want your lab work to run smoothly and efficiently. In this article, I'll walk you through the basics—starting with how to spot the key components and what they do to help you hit those perfect results. Understanding how to interpret speed and RCF (that’s Relative Centrifugal Force) really matters, because those numbers can make or break your experiments. Plus, we’ll look at how factors like sample volume and density can throw things off or help you get more accurate results. Sometimes, tweaking these can really boost your experiment’s precision.
We’ll also point out some common mistakes people make when reading these diagrams—so you can avoid the pitfalls and keep your results solid. And, of course, I’ll highlight how making good use of these diagrams can actually make your whole workflow smoother. Thanks to innovations from companies like Zhejiang Pushkang Biotechnology Co., Ltd. in centrifugal microfluidics, mastering these concepts is more important than ever, especially when working on high-quality IVD products like coagulation or molecular testing. So, all in all, understanding this stuff isn’t just technical jargon—it’s key to getting better, reliable results in your lab work.